A finished car seat gives away almost nothing about how it was built. The fabric hides the shell, the shell hides the frame, and the frame hides the decisions that actually determine whether the seat protects a child. So here is the whole process, stage by stage, from our own floor.
Quick Answer A child car seat is made in nine stages: design and sample confirmation, product development, mold manufacturing, molding the shell, fabric cover production, assembly, quality inspection, bulk production approval, and packing. The two stages that decide quality are the ones buyers never see — mold making, which sets wall thickness and precision for every unit that follows, and testing, which proves the design actually works. Everything else is execution.
Ask most people how a car seat is made and they picture an assembly line. That is the last quarter of the story. By the time a shell reaches assembly, its safety performance is already fixed — decided weeks earlier by a mold designer and a materials choice.
This guide walks the full sequence. At each stage we have added what an importer should verify, because the same steps that build the seat are the steps where quality is either protected or quietly removed.
Why trust this guide: Bewell has manufactured child car seats in Ningbo since 2015. We run the full chain in-house — R&D, mold design and making, blow and injection molding, sewing, assembly, inspection, and testing. The nine stages below are our own production flow, not a generic diagram.
Every seat starts as a decision about who it is for. Height range, market, price point, install method. A seat for a 40 to 150 cm range needs a rotating base and a five-point harness. A booster for 125 cm and up needs neither. Those choices lock in before anyone draws anything.
For an OEM project, this is where the customer's drawings, reference sample, or brief arrives. For our own models, it is where the product team defines the target and the market it must be certified for. If you are unsure which type fits your market, our guide to car seat types maps the whole range.
What a buyer should check: that the target certification is named at this stage, not later. Adding a market after development starts usually means retesting.
02Stage 2: Product development
Engineers turn the brief into a real structure. This stage sets the load paths — where crash force will travel, and what will carry it. The anti-rotation method is decided here too: a support leg braced to the floor, or a top tether strapped to an anchor. That single choice determines which cars the finished seat can be used in, which is why we cover it separately in support leg vs top tether.
Material grade is also fixed here. We use 100% virgin plastic. Recycled material is cheaper and behaves less predictably under impact, which is exactly the wrong trade in a safety product.
03Stage 3: Mold manufacturing
This is the stage almost nobody asks about, and the one that matters most.
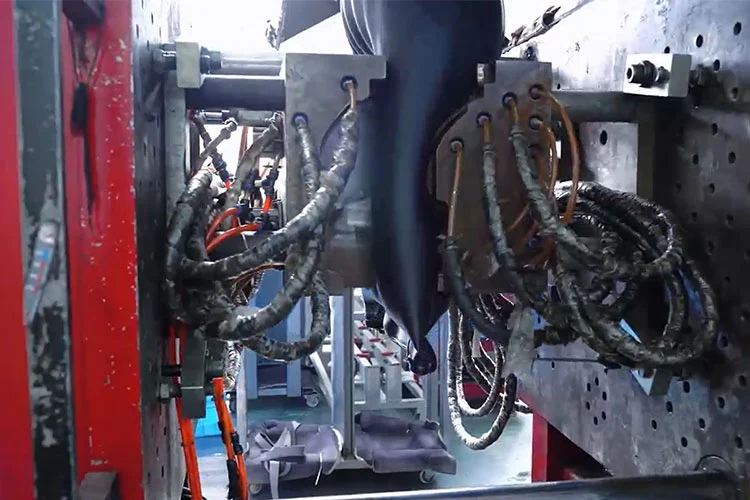
A mold is a machined steel tool. Once it exists, every single shell that comes out of it inherits its geometry — its wall thickness, its rib layout, its tolerances. A well-cut mold produces 200,000 consistent shells. A poorly cut one produces 200,000 shells with the same weak spot.
From the factory floor — why we make our own molds
Having an in-house mold shop is not about saving money. It is about speed of correction. When a test shot comes out with a thin wall in one corner, we walk to the mold shop and adjust it. A factory that outsources tooling has to describe the problem, ship the tool, wait, and hope.
That difference shows up most in OEM work. A custom shell almost always needs two or three tooling revisions before it is right. In-house, that is days. Outsourced, it is weeks each time.
What a buyer should check: ask whether the supplier cuts its own molds or sends drawings out. It predicts how fast your revisions will move. Tooling is also the biggest cost line in custom work — see our OEM guide.
04Stage 4: Molding the shell
Now plastic becomes structure. We run two methods, and a serious range uses both.
The two molding methods, and what each is used for
Method
Produces
Used for
Injection molding
Solid, dense, precise parts
Bases, belt guides, ISOFIX housings, booster shells
Blow molding
Hollow, double-walled shells
Large one-piece shells that absorb and spread crash energy
Neither is better. They solve different problems, which is why our flagship BW25 uses both in one seat — a blow-molded body over an injection-molded structure. The full technical comparison is in our molding explainer.
Our injection molding workshop. Five injection machines and five blow molding machines run the shell lines.
Where cheap seats are made cheap. Thinning the wall by a fraction of a millimeter saves material on every unit and is invisible under the fabric. It is also where a shell fails under load. Wall consistency is not a detail — it is the product.
05Stage 5: The parts you never see
A shell alone is not a car seat. Several components go in before the cover does, and each has a job in a crash.
Steel frame. Built into the base of our rotating models. It holds the rotation mechanism together under load, so the spin lock stays a lock.
Energy-absorbing foam. Rigid foam in the shell and head wings, which crushes to absorb impact. This is not the soft memory foam a customer feels — that layer is for comfort. We explain the difference in the booster guide.
Five-point harness and buckle. The harness spreads crash force across the shoulders and hips. The buckle must open easily for an adult and never open on its own.
Anchoring hardware. ISOFIX connectors, the support leg, or the tether webbing and hook.
Everything that protects a child in a crash is hidden by the time the seat reaches a shelf. That is exactly why paperwork and testing matter more than appearance.
06Stage 6: Fabric cover production
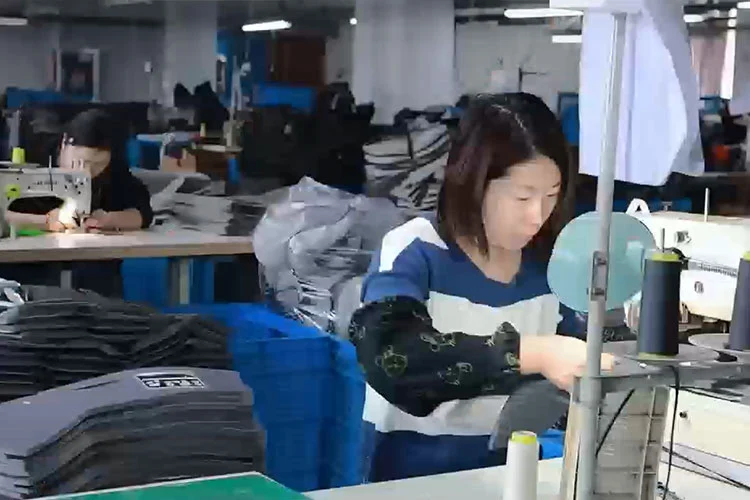
Covers are designed, cut, and sewn in our own sewing workshop. The fabric has to do more than look right. It must be non-toxic against a child's skin, breathable enough for long trips, colorfast so it does not fade unevenly, and durable through repeated washing.
This is also where most OEM personality lives. Custom colors, logo embroidery, and label design all happen here — and none of it requires new tooling, which is why appearance customization is affordable while structural change is not.
07Stage 7: Assembly
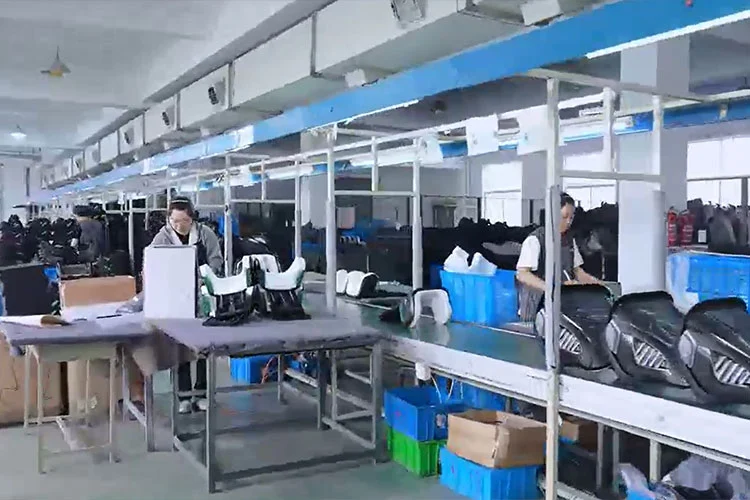
Shell, foam, frame, harness, buckle, hardware, and cover come together as one product. Assembly is repetitive work, and repetitive work is where small errors multiply — a harness routed slightly wrong, a connector not fully seated, a label applied to the wrong model.
Good assembly is therefore mostly about sequence and checking. Each seat is built in a fixed order, and functional parts are tested as they go in rather than only at the end.
08Stage 8: Testing and inspection
Two different things happen here, and buyers often confuse them.
Type approval testing proves the design is safe. It is done once, by a recognized authority, and produces the certificate. Ongoing production testing proves that what leaves the line today still matches that approved design. Both are needed. A factory with only the first is showing you a photograph of its best day.
On top of third-party approval, we run COP (Conformity of Production) checks and crash-test 1 in every 5,000 seats we build. Our approvals are published as downloadable certificates: BW25, BW15, and BW26A R129/04. What each standard requires is covered in our R129 guide.
09Stage 9: Packing and shipment
The last stage is more commercially important than it looks. Car seats are bulky, so a large share of what you pay to ship is air. How the product is shaped and boxed decides how many units fit a container — and that moves your cost per seat more than most buyers expect.
In our own loading, a compact backless booster fits roughly 2,190 units in a 40HQ, while a bulky high-back booster fits around 518. Same container, more than four times the units. We break the math down in the pricing and lead time guide.
What a buyer should check: ask for units per 40HQ before comparing quotes. A small win on unit price can vanish in freight.
Where quality is really won or lost
If you take one thing from the nine stages, take this: the visible stages are the least decisive ones. Assembly and packing are execution. What separates a good seat from a dangerous one happens at mold making, material choice, and testing — three stages that leave no trace on the finished product.
That is inconvenient for buyers, because it means you cannot evaluate a car seat by handling it. You have to evaluate the factory. Practically, that means four questions:
Do you cut your own molds, and mold your own shells?
Is the material 100% virgin?
Which standard is the approval, and is the certificate in your own company name?
Do you run COP testing, and how often do you crash-test production units?
In nine stages: sample confirmation, product development, mold manufacturing, molding the shell, fabric cover production, assembly, quality inspection, bulk production approval, and packing. Mold making and testing are the stages that most affect safety.
What are car seat shells made of?
Usually a high-strength plastic such as polypropylene, chosen for its balance of strength, flex, and low weight. Quality factories use 100% virgin material rather than recycled, because recycled plastic behaves less predictably under impact.
How long does it take to manufacture a car seat order?
A prototype typically takes about 7 to 15 days, and mass production about 30 to 40 working days after the deposit and confirmed details. New tooling adds time on top of that.
What is inside a child car seat?
Behind the fabric there is a molded shell, energy-absorbing foam, often a built-in steel frame, a five-point harness with buckle, and anchoring hardware such as ISOFIX connectors with a support leg or top tether.
How do I know a car seat factory is a real manufacturer?
Ask whether they cut their own molds and mold their own shells, request a live video call from the molding line, and check that the safety certificate is issued in their own company name.
What is COP testing?
Conformity of Production testing is ongoing verification that seats coming off the line still match the approved design. Type approval proves one sample passed; COP proves production keeps passing.
About Bewell
Ningbo Bewell Baby Products Manufacturing Co., Ltd. has manufactured child safety seats since 2015. Our Ningbo factory covers over 10,000 m² with 100+ employees, five blow molding and five injection molding machines, an in-house mold shop, sewing workshop, assembly lines and quality inspection, and an annual capacity of 200,000+ seats. Every model is certified to ECE R129 (i-Size); we hold China 3C certification and ISO 9001, use 100% virgin material, run regular COP tests, and crash-test 1 in every 5,000 seats. We supply OEM and ODM programs and export to more than 40 countries.
We use cookies to offer you a better browsing experience, analyze site traffic and personalize content. By using this site, you agree to our use of cookies.
Privacy Policy