

You bought the seat. Now the manual shows two ways to install it, and nobody tells you which one to choose.
Parents usually assume the metal connectors must be the stronger option. They aren't. Lower anchors exist to make a correct installation easier, not tougher — and that distinction changes how you should decide.
We build car seats, so we design and crash-test both belt paths into every shell we make. This guide covers what each method actually does, how to prove yours is tight, and the one weight limit that catches almost everyone off guard.
Safety Performance: What the Crash Standards Actually Say
Here's a fact that surprises people: no regulator publishes a head-to-head crash comparison of ISOFIX versus seat belt installation. Not NHTSA, not UNECE.
That absence is the answer. Both methods must carry the same seat through the same test to the same pass mark. A seat certified under ECE R129 gets tested in its ISOFIX configuration and again in any belt configuration the maker approves. Under FMVSS 213 in the US, the same logic applies. Neither route earns a certificate by being merely adequate.
So the real difference sits elsewhere — in the ceiling each system hits, and in how often people get each one right.
| ISOFIX / lower anchors | Vehicle seat belt | |
|---|---|---|
| Crash performance when tight | Meets standard | Meets standard |
| Weight ceiling (US) | 65 lb combined — child + seat | None for this purpose |
| Confirmation you did it right | Audible click, green indicator | Judgment — check for slack |
| Typical failure mode | Connector not fully latched | Retractor never locked |
| Works in every car | Only where anchors exist | Almost always |
The 65-pound rule has a real origin. NHTSA ran sled tests using a 77-pound dummy at 30 mph and the lower anchors overloaded — in one test the anchor tore through the vehicle's sheet metal. The rule took effect in February 2014. Vehicle seat belts face no such limit, because they were engineered to restrain full-grown adults.
Every shell we mold carries two separate belt paths — one for rear-facing, one for forward-facing — and each gets validated in crash testing. That's why routing through the wrong path matters so much. You aren't just making it look untidy. You're using a load path nobody tested.
One more number worth knowing: NHTSA estimates roughly three out of four car seats show some installation error. That statistic is the whole reason lower anchors exist.
Installing Both Ways, With Measurable Checks
Both installs follow the same shape. Route, lock, tighten, verify. The verification step is where most people quit too early.
Lower anchors (ISOFIX / LATCH)
- Find the two anchor bars in the seat crack. Look for the small anchor symbol stitched or stamped on the upholstery.
- Route the connectors through the correct belt path for your direction of travel.
- Push each connector on until it clicks. Rigid connectors show a green indicator; strap-style hooks should face the correct way with no twist in the webbing.
- Press down into the seat with your body weight and pull the adjuster strap tight.
- Forward-facing: attach the top tether and remove its slack. Rear-facing with a support leg: extend the leg to the floor until it seats firmly and reads green.
Vehicle seat belt
- Route the belt through the correct path and buckle it.
- Lock the retractor. Pull the shoulder belt all the way out until it clicks, then feed it back in. It should ratchet and refuse to extend. Skip this and the belt pays out in a crash.
- Press down into the seat and feed the slack back into the retractor.
- Attach the top tether for any forward-facing install.
Print this: the 60-second tightness card
| Check | Pass looks like |
|---|---|
| Movement at the belt path | Under 1 inch side to side and front to back |
| Grip point | At the belt path — never the top of the shell |
| Recline angle | Indicator inside its marked range |
| Top tether (forward-facing) | Attached to a real tether anchor, no slack |
| Support leg | Firm floor contact, indicator green, not on a storage lid |
| Harness | No slack to pinch at the collarbone |
| Belt retractor (belt install) | Locked — will not pay out |
Grabbing the top of the shell is the mistake we see most. Every seat flexes up there. Judge it at the belt path or you're measuring plastic, not installation. Our step-by-step rear-facing install guide shows the grip position, and the top tether guide covers anchor identification.
Vehicle Compatibility: Anchors, Older Cars, and Adapters
US vehicles built from September 2002 onward carry lower anchors. Where they sit, and how many positions have them, varies by model.
| Where to look | What you'll find |
|---|---|
| Vehicle owner's manual | The definitive map of which positions have anchors and tether points |
| Rear seat crack | A small anchor icon on the upholstery; the bars sit an inch or two back |
| Rear shelf, seat back, cargo floor, or ceiling | Tether anchors — location varies by body style |
| Center seating position | Often has no dedicated anchors, even when both outboard seats do |
The center rear seat catches many families out. It's statistically the safest position in most vehicles, but plenty of cars leave it without lower anchors. Borrowing one anchor from each outboard position is prohibited unless your vehicle manual specifically allows it. The correct move: install in the center with the seat belt. That's a stronger choice than moving your child to a side position just to use anchors.
Switching seats between cars, or riding in taxis and rentals? The belt install wins on portability. It works in nearly every vehicle and doesn't depend on locating anchors in an unfamiliar back seat. Many parents learn the belt method precisely because it travels.
Age, Weight, and Height: Choosing the Right Method
Your child's size decides the method more than your preference does. Here's the decision path.
| Situation | Use | Why |
|---|---|---|
| Rear-facing, child + seat under 65 lb | Either — anchors if available | Both certified; anchors are easier to verify |
| Child + seat at or above 65 lb | Seat belt (keep the tether) | Lower anchors are no longer rated for the load |
| Center seat with no anchors | Seat belt | Center position beats side position; never borrow anchors |
| Any forward-facing harness seat | Either bottom method + top tether | Tether limits how far the head travels forward |
| Belt-positioning booster | Vehicle belt restrains the child | Anchors, where allowed, only stop the empty booster becoming a projectile |
| Moving between multiple cars | Learn the belt install | Works in nearly every vehicle you'll meet |
Do the 65-pound math once and write the number on a sticky note. A 25-pound seat means switching to the belt when your child hits 40 pounds. Some forward-facing seats permit 69 pounds combined — your label states which applies. And remember: switching to the belt changes nothing about the tether. It stays on.
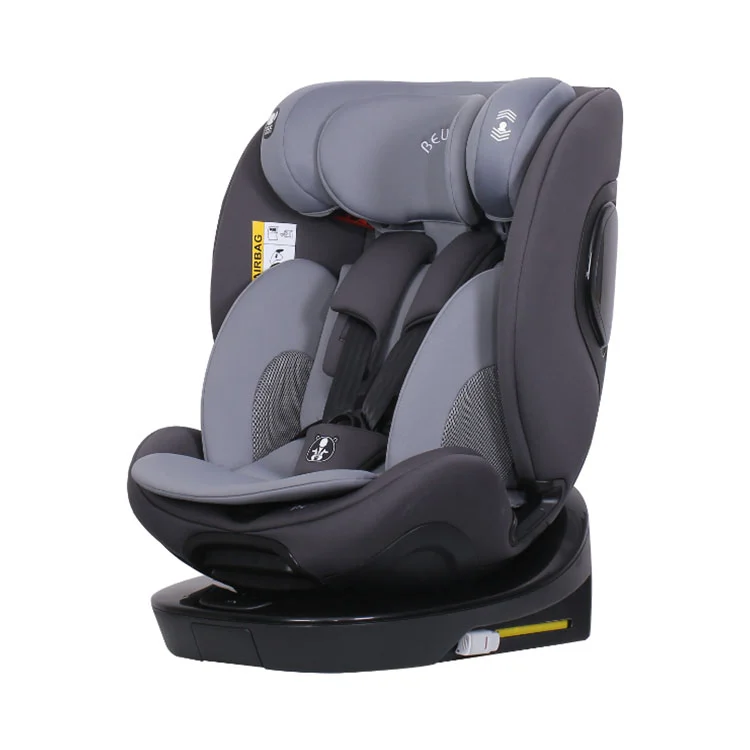
Support leg or top tether? Both stop the seat rotating forward, from opposite ends. A tether pulls the top back; a leg braces the base against the floor. We build both across our range — the BW23 uses ISOFIX with a top tether, while the BW22 and BW25 use ISOFIX with a support leg. Neither is superior. Use whichever your seat was engineered and certified with, and never improvise a substitute.
Not sure which stage your child is in? Our car seat stages by age guide lays out all four stages and the signals to move up.
Long-Term Use, Wear Checks, and Professional Fitting
Installation hardware wears. Most parents never inspect it. Run this check twice a year — it takes three minutes.
| Part | What to look for | Action if it fails |
|---|---|---|
| ISOFIX connectors | Clicks crisply, indicator turns green, no visible rust or bent metal | Contact the maker — never lubricate or force |
| Anchor webbing / tether strap | No fraying, cuts, or chemical stiffness | Replace the part; damaged webbing fails under load |
| Buckle and harness | Snaps shut firmly, adjuster runs smoothly | Rinse in warm water; if it still sticks, replace |
| Shell and base | No cracks, especially around the belt path | Retire the seat |
| Date label | Still inside the useful life printed on the seat | Retire the seat |
Buying or accepting a used seat adds three more checks: confirm it has never been in a crash, confirm the model isn't under recall, and confirm the date label is readable and current. If any of those can't be verified, pass on it. Our guides on car seat expiration and safe cleaning cover the parts that quietly degrade.
And if you want a trained set of eyes on your install, a certified Child Passenger Safety Technician will check it for free. NHTSA runs a station finder covering most of the US. Worth doing once, on the install you'll use every day.
FAQs
Is ISOFIX (LATCH) safer than installing a car seat with the vehicle seat belt?
No. Both hold a seat safely when both are tight. Lower anchors were introduced to make a correct install easier to achieve, not stronger. A tight belt install beats a loose anchor install every time — and the reverse is also true. Tightness decides this, not hardware.
How do I know my car seat is tight enough?
Grip the seat at the belt path — where the belt or anchor strap runs through the shell — and pull firmly side to side and front to back. Less than one inch of movement passes. Grabbing the top of the shell instead will always show movement and tells you nothing useful.
My older car has no ISOFIX anchors. Can I still use an ISOFIX car seat?
Usually yes, by installing it with the seat belt instead. Every certified seat is designed and crash-tested with a belt path for exactly this. Check your seat's manual first — a few models are anchor-only. Never buy an aftermarket anchor kit that your vehicle maker doesn't supply.
What is the 65-pound rule for lower anchors?
In the US, stop using lower anchors once your child plus the car seat together reach 65 pounds. So a 25-pound seat means switching at a 40-pound child. NHTSA set the limit after sled tests overloaded the anchors. Seat belts have no equivalent ceiling — they're built to restrain adults.
Do I still need the top tether if I install with the seat belt?
Yes. Forward-facing seats need the top tether no matter how the bottom is installed. The tether stops the seat from pitching forward and pulls your child's head back several inches in a crash. Skipping it is one of the most common — and most costly — installation mistakes.
Can I use lower anchors and the seat belt at the same time for extra security?
No, unless your manual specifically permits it, and almost none do. Two systems create two competing load paths. In a crash they pull against each other and the seat behaves in a way nobody tested. Pick one method, get it tight, and add the tether.
The Bottom Line
Stop asking which method is safer. Ask which one you can install tight, in this car, today.
Lower anchors give you a click and a green window — useful feedback, but only up to 65 combined pounds. Seat belts work everywhere, in every vehicle, with no weight ceiling, provided you lock the retractor. Both pass the same crash tests. Both fail the same way if you leave slack in them.
Check at the belt path. Under one inch. Tether on. That's the whole test.
Every Bewell seat ships with rigid ISOFIX connectors and a certified belt path, so you can install it either way. Browse the full ECE R129 range, or see the engineering behind the hardware in our guide to how car seats protect a child in a crash.
About Bewell
This article gives general guidance for the US market. Your car seat manual and vehicle owner's manual override it — check both before installing.
Sources:
- NHTSA — Car Seats and Booster Seats: installation, LATCH guidance, and inspection stations
- UNECE — Regulation No. 129 (Enhanced Child Restraint Systems)
- Bewell 2026 Product Catalogue — connector, belt path, and support leg specifications