

Roughly 46% of car seats in the U.S. are installed wrong. That number is from NHTSA, not a marketing slide.
Most of those mistakes aren't because parents don't care. They're because car seat manuals are 80 pages of fine print, vehicle manuals are worse, and the instructions assume you already know what "LATCH" means.
This guide cuts through that. Two installation methods, in order from easiest to trickiest, with the steps that actually matter and the mistakes I see again and again in our lab.
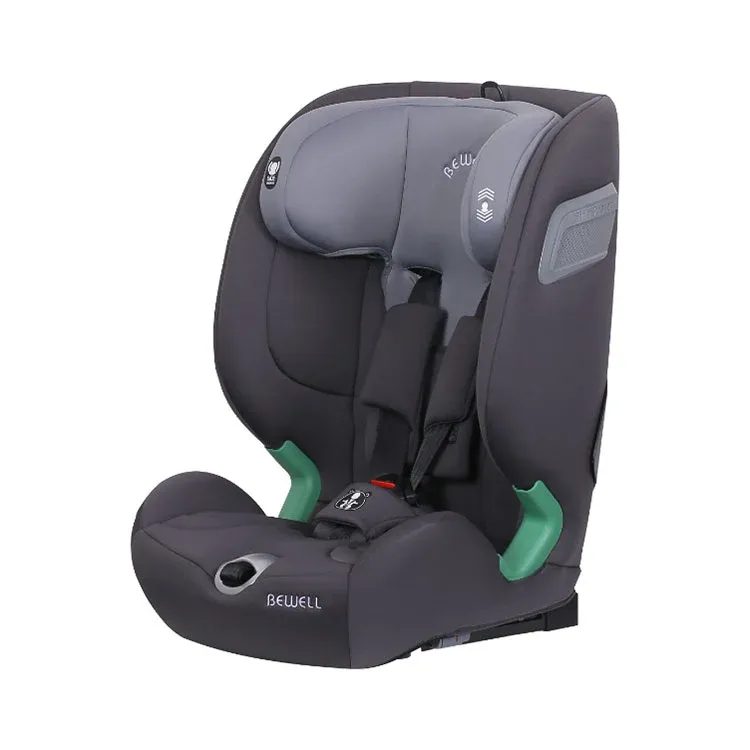
Before You Start: 4-Item Pre-Install Checklist
Five minutes of prep saves an hour of frustration. Run through this before you touch the seat.
1. Read your seat's manual.
I know. But every model is slightly different — belt paths, recline limits, weight thresholds. The manual is the only source that matches your exact seat.
2. Check your vehicle's manual.
Find the section on "child restraint systems." It tells you where the LATCH anchors are, whether the middle seat has them, and which seating positions are approved. Most parents skip this. They shouldn't.
3. Pick the right seat in the car.
The middle of the back row is statistically the safest spot — furthest from any impact point. But only use it if your car has working LATCH anchors there. If not, the back row outboard seats are the next best.
4. Confirm your child fits the seat.
Read the rear-facing height and weight limits on the side of the seat. Most kids will be rear-facing for years — we explain when to actually switch to forward-facing in our companion guide.
Method 1: Installing with ISOFIX / LATCH
If your car has LATCH (in Europe and Asia it's called ISOFIX), use it. It's faster, harder to get wrong, and the design exists specifically because seat belt installations were causing too many errors.
Here's the process.
- Locate the LATCH anchors. They live in the crease where the back of the seat meets the bottom cushion. Look for a small child-seat icon. If you can't find them visually, push your hand into the crease — you should feel two metal U-shaped bars.
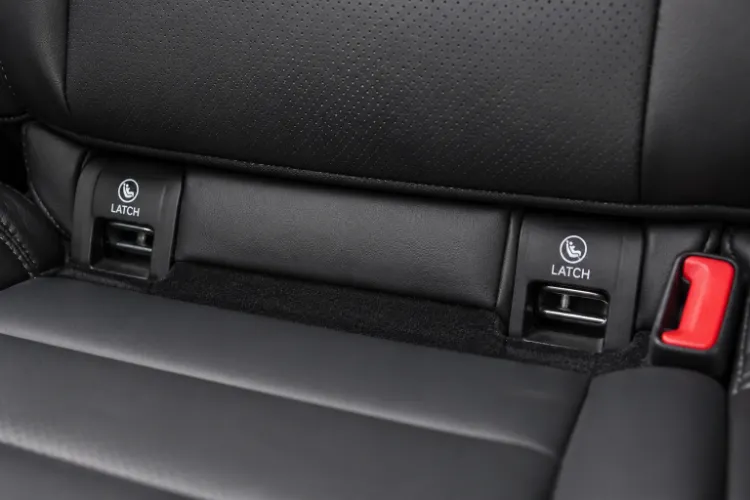
- Route the LATCH straps through the rear-facing belt path. Every convertible seat has two clearly marked belt paths — one rear-facing, one forward-facing. Use the rear-facing one. This is the single most important step. Get it wrong, and nothing else matters.
- Click the connectors into the anchors. Listen for the click on both sides. Then tug each connector to confirm it's locked. If one doesn't click, the seat is not installed — it's just sitting there.
- Press down and pull the strap tight. Here's where most people fail. Put your weight on the seat — knee in the middle, push down hard — while pulling the LATCH tightening strap. Keep pulling until the seat won't move. Not "feels tight." Actually won't move.
- Set the recline angle. Use the seat's built-in indicator (more in section 4). Set it before you finalize — adjusting later is a pain.
- Run the 1-inch test. Grasp the seat at the belt path and try to push it side-to-side and front-to-back. More than 1 inch of movement in any direction means it's not tight enough. Re-tighten.
Note on top tether: for rear-facing installation in the U.S., you generally don't use the top tether — that's primarily a forward-facing component. We cover what a top tether is and when to use it in a separate guide.
Method 2: Installing with the Vehicle Seat Belt
Use this if your car doesn't have LATCH (vehicles older than 2002 in the U.S., for example), or if you're installing in a center seat where LATCH isn't available. Some newer cars also require seat-belt installation in certain positions — check your vehicle manual.
Critically: do not use both LATCH and the seat belt at the same time. Pick one. Doubling up doesn't make it safer — it can actually undermine the install.
- Thread the seat belt through the rear-facing belt path. Same belt path as above — the one labeled rear-facing. Buckle it normally.
-
Lock the seat belt. This is the step most people miss. A normal belt isn't locked. To lock it:
- Pull the shoulder portion all the way out, until it stops.
- Slowly let it retract.
- You'll hear a ratcheting click. That's lock mode.
- Apply body weight, pull all the slack out. Knee in the middle of the seat, press down, and pull every inch of slack out until the belt locks tight against the car seat.
- Set the recline angle. Same as LATCH. Use the indicator.
- Run the 1-inch test. Same as LATCH. Less than 1 inch of movement at the belt path.
The Recline Angle (Most Common Mistake)
The recline angle is what keeps a baby's head from flopping forward — which can block their airway, even outside of a crash.
Every modern rear-facing seat has a built-in recline indicator, usually one of three styles:
- Bubble level: a fluid bubble that needs to sit between two lines.
- Color band: a colored stripe that needs to sit within a marked zone.
- Line indicator: a line that needs to be parallel to the ground.
Different ages need different angles. A newborn needs a more reclined position (around 45°) so their head doesn't slump. An older toddler — sitting up, neck strong — can be more upright (closer to 30°). Most seats mark a range on the indicator. Stay within it.
If your back seat is sloped and you can't hit the right angle, most rear-facing seats include a wedge or adjustable foot. Use them. They're not optional.
The 1-Inch Rule: How to Check It's Tight
The single test that catches most bad installs.
Grasp the car seat at the belt path — where the seat belt or LATCH strap actually contacts it. Don't grab the top, don't grab the headrest. The belt path.
Now push it. Side-to-side, then front-to-back.
If the seat moves less than 1 inch in any direction, it's tight enough. If it moves more, re-tighten.
That's it. One inch. The whole standard.
5 Installation Mistakes I See Every Week
From years of reviewing customer installation photos and consulting with CPSTs:
1. Wrong belt path. Using the forward-facing belt path on a rear-facing install. The seat will feel tight, but the geometry is wrong — in a crash, it doesn't hold. Always double-check the label.
2. Loose harness on the child. Separate from the install itself. The harness needs to be tight against your child — you shouldn't be able to pinch a fold of webbing at the shoulder. (The pinch test.)
3. Chest clip too low. It belongs at armpit level. Not the belly, not the ribs. A low chest clip can let a child eject from the harness in a crash.
4. Locking the seat belt incorrectly. If you used the seat-belt method but forgot to lock the belt, the install will feel fine but isn't. Always do the pull-all-the-way-out test.
5. Mixing LATCH and seat belt. More straps does not equal safer. The seat is engineered for one or the other. Pick one method.
Get Your Install Inspected for Free
Even with this guide, a second pair of eyes from a certified Child Passenger Safety Technician is the gold standard. They'll catch what you can't see.
Free inspection stations exist almost everywhere in the U.S.:
- Most fire stations have at least one CPST on staff.
- Many hospitals run regular car seat clinics.
- Police stations and community centers often host monthly inspection events.
- Search "car seat inspection near me" on the NHTSA website (nhtsa.gov/equipment/car-seats-and-booster-seats).
Most appointments are 20–30 minutes and completely free. They'll watch you install it, point out anything off, and have you re-do it until it's right.
FAQs
Do I need to use the top tether for a rear-facing install?
Generally no, not in the U.S. Top tethers are primarily for forward-facing seats. A few seats and standards (some European i-Size models, certain rear-facing configurations) do use a tether or anti-rotation device, but read your specific manual.
Can I install a car seat in the front seat?
Only if your vehicle has no back seat or all back seats are occupied by other children. And never with an active passenger-side airbag. Airbag deployment against a rear-facing seat can be fatal.
How tight is "tight enough"?
Less than 1 inch of movement at the belt path in any direction. If it moves more, it's not done.
Why does my seat keep leaning to one side?
Usually one LATCH strap (or one side of the seat belt) is tighter than the other. Loosen both, re-tighten with even pressure on each side, and check the recline indicator from both angles.
Can I install a rear-facing seat in a small car?
Yes, but the front passenger seat will need to slide forward to make room. As long as the front-seat occupant still has legroom and the rear-facing seat is properly installed, it's fine.
Do I need to re-install the seat every time I take it out?
Yes. If you remove the base or seat to clean it, transfer it to another car, or get it inspected, redo the full install — including the 1-inch test — when you put it back.
The Bottom Line
A correctly installed seat does the safety job it was engineered for. An incorrectly installed seat is a hope. The difference takes 15 minutes to learn and 5 minutes to verify.
Our BW17 with integrated top tether system and BW23 all-in-one (ages 0–12) are designed around clear belt-path labels, visible recline indicators, and an install path that's harder to get wrong. Because the best seat isn't the most expensive one — it's the one you install right every single time.
Then go book that free inspection.
About the Author
This article is for informational purposes. Always consult your car seat's manual, your vehicle's manual, and a certified Child Passenger Safety Technician for guidance specific to your situation.
Sources:
- National Highway Traffic Safety Administration — Car Seat Installation Recommendations
- American Academy of Pediatrics — Child Passenger Safety Policy Statement (2018, reaffirmed February 2025)
- Safe Kids Worldwide — Car Seat Inspection Network
- UNECE Regulation No. 129 (i-Size) — Enhanced Child Restraint Systems